Difference between revisions of "Creating your first ta project"
| Line 2: | Line 2: | ||
<categorytree mode=all depth=1>Web_Test_Automation_Tutorial</categorytree> | <categorytree mode=all depth=1>Web_Test_Automation_Tutorial</categorytree> | ||
</div> | </div> | ||
| + | |||
| + | == Creating the project folder == | ||
| + | |||
| + | The easiest way to do this is using [[Lapis_Lazuli]]'s build in <code>create</code> function. This will create all needed folders and files to get started. If you like, you could also do this manually. | ||
| + | |||
| + | # Open the console | ||
| + | # Go to the folder where you want to create you project | ||
| + | #* E.G.: <code>cd C:/ruby/projects/</code> | ||
| + | # Write <code>lapis_lazuli create <projectname></code> | ||
| + | #* Where <projectname> is the name of your project without `<>` | ||
| + | |||
| + | [[File:Ll-creat-project.png|200px|thumb|left|Console result creating project]] | ||
| + | <br clear="all" /> | ||
| + | |||
| + | === Test running the project === | ||
| + | |||
| + | The project created by Lazis Lazuli has some basic scripts. To confirm it's working properly, let's run it! | ||
| + | |||
| + | Continue from where we left off in the console: | ||
| + | <code> | ||
| + | > cd <projectname> | ||
| + | > cucumber | ||
| + | <code> | ||
| + | |||
| + | |||
=== Folder structure === | === Folder structure === | ||
| Line 20: | Line 45: | ||
14.──/sceenshots/ | 14.──/sceenshots/ | ||
</source> | </source> | ||
| − | |||
| − | |||
[[Category:Web Test Automation Tutorial|2]] | [[Category:Web Test Automation Tutorial|2]] | ||
Revision as of 13:02, 22 June 2016
Creating the project folder
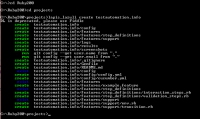
The easiest way to do this is using Lapis_Lazuli's build in create function. This will create all needed folders and files to get started. If you like, you could also do this manually.
- Open the console
- Go to the folder where you want to create you project
- E.G.:
cd C:/ruby/projects/
- E.G.:
- Write
lapis_lazuli create <projectname>- Where <projectname> is the name of your project without `<>`
Test running the project
The project created by Lazis Lazuli has some basic scripts. To confirm it's working properly, let's run it!
Continue from where we left off in the console:
> cd <projectname>
> cucumber
Folder structure
01.─┬/config/
02. ├─> config.yml
03. └─> cucumber.yml
04.─┬/features/
05. ├─┬/step_definitions/
06. │ ├─> interaction_steps.rb
07. │ └─> validation_steps.rb
08. ├─┬/support/
09. │ └─> env.rb
10. ├─> example.feature
11. └─> mobile.feature
12.──/log/
13.──/results/
14.──/sceenshots/
